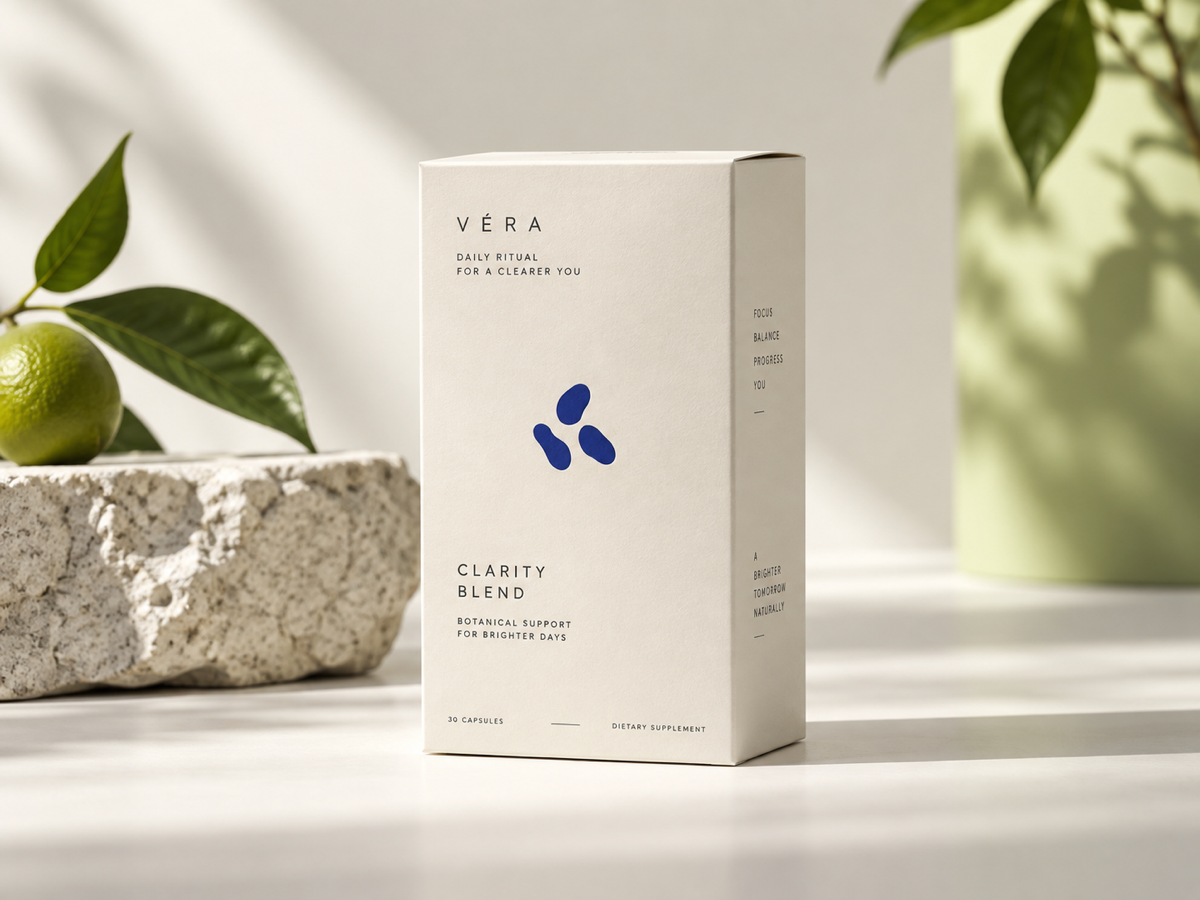
Packaging that stays readable
Start with a front-facing box or pouch, choose the isolated mode, and ask for a clean edge with the original logo, label text, colors, and proportions preserved.
Check every character on the front panel at full size.
Turn one approved product reference into polished ai product photography for catalogs, marketplaces, and campaign concepts—while keeping the product identity, label, and shape in view.
Your product photo appears here
Upload one clear product reference, choose a mode, and describe the result you need.
Use the same reference-first workflow for packaging, skincare, and footwear. Treat each image as a draft to inspect against the original before publishing.
Start with a front-facing box or pouch, choose the isolated mode, and ask for a clean edge with the original logo, label text, colors, and proportions preserved.
Check every character on the front panel at full size.
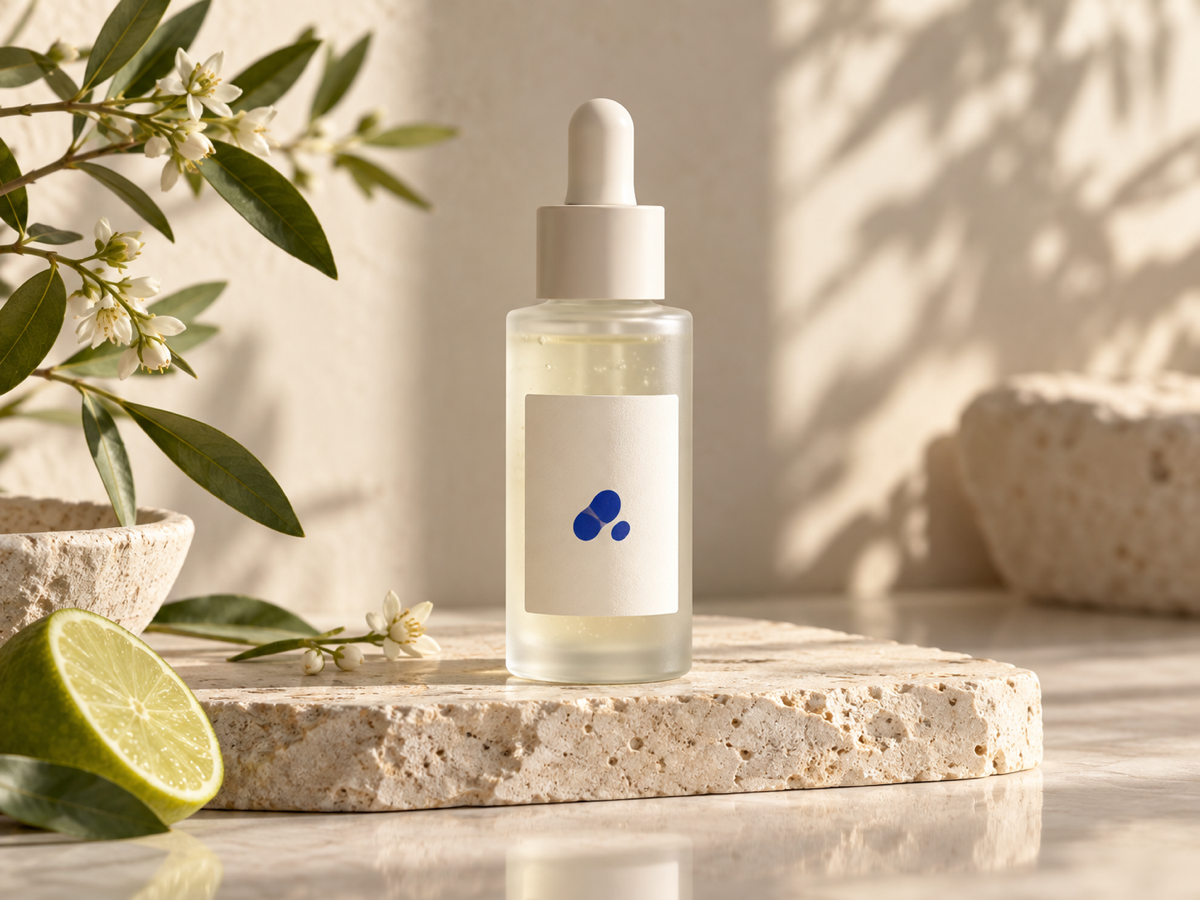
Use a bottle or pump reference and describe the desired surface, reflection, and light direction. The scene mode can add context without handing over the product geometry.
Check the cap, pump, liquid level, and finish for drift.
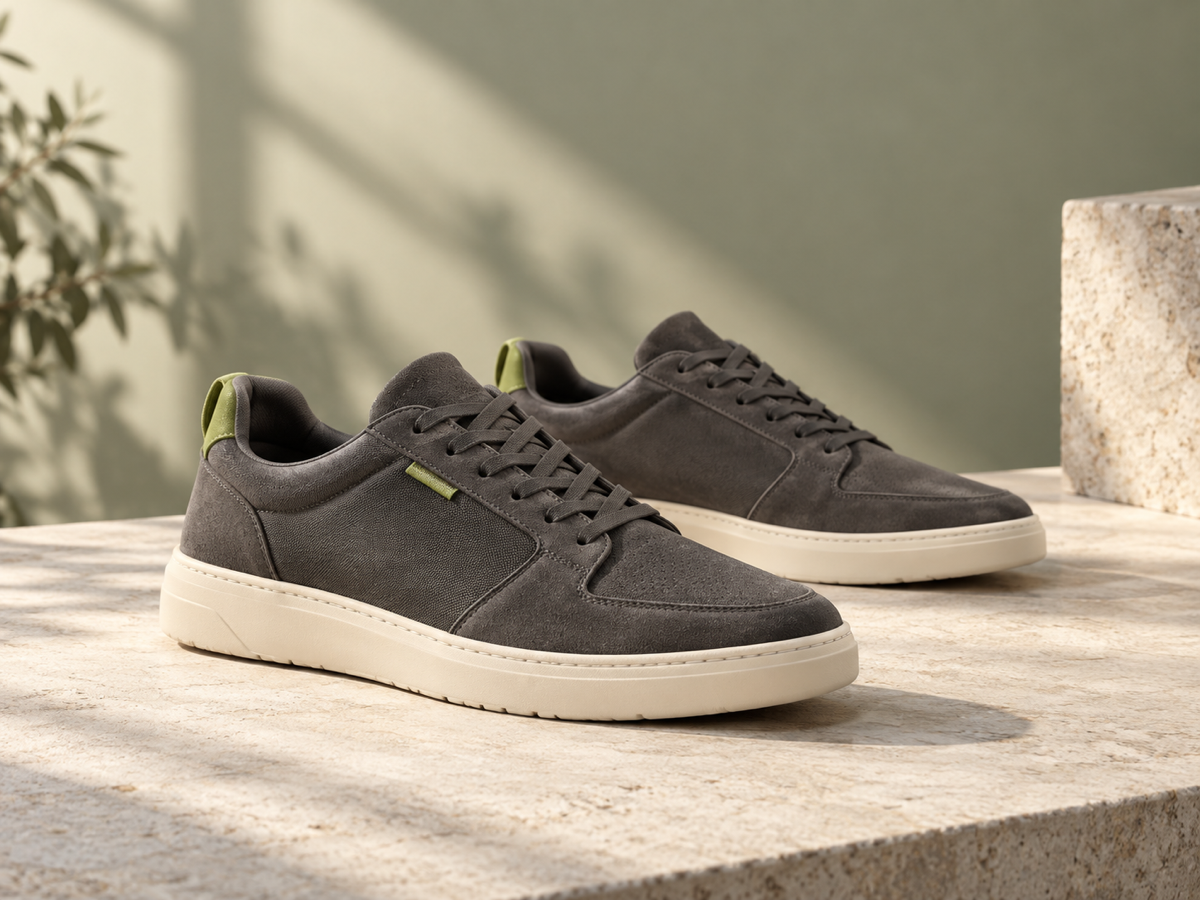
Upload a clear shoe angle, then create a white-background listing image or a controlled campaign scene. Keep the sole, stitching, materials, and brand marks in the review checklist.
Check both silhouette and outsole details before download.
A reliable result comes from a clear source, a mode with a defined job, and a final inspection loop.
Choose a sharp JPG, PNG, or WebP image with the product visible. Use an authorized source and show the label, silhouette, and important edges as clearly as possible.
Select White background for an isolated catalog cutout, or Lifestyle scene for a campaign context. These modes change both the composition brief and the output background behavior.
Name the camera angle, surface, lighting, props, negative space, and aspect ratio. State what must not change: logo, label text, product shape, materials, and proportions.
Inspect the result at full size, compare it with the source, and check text, edges, reflections, stitching, shadows, and geometry. Download only when it matches the brief.
Product photography is not just a prompt. It is a controlled choice between a clean listing asset and a persuasive scene.
The White background mode asks for a transparent isolated subject, which can be previewed on white and reused in commerce layouts.
The Lifestyle scene mode uses an opaque background and gives the prompt room to describe surfaces, light, props, and campaign mood.
The workbench keeps reference count, aspect ratio, resolution, and the current credit total visible before a signed-in generation request.
The page explains what to inspect because generated product imagery still needs a human check for packaging text, logos, shape, and material detail.
A strong prompt has four parts: the product to preserve, the scene or background, the camera and light, and the details that must not drift.
“Create a clean isolated catalog product photo on a transparent background. Preserve the box silhouette, every printed word, logo placement, colors, edges, and proportions. Center it with soft even lighting and no props or cast shadow.”
The prompt describes the output job and gives packaging text and geometry priority over decoration.
“Place the original skincare bottle on a warm limestone shelf with soft morning window light, subtle botanical shadows, and generous negative space on the left. Preserve the label, cap, pump, glass reflections, proportions, and brand colors exactly.”
The scene is specific enough to art-direct while the preserve list protects the product's identity and material cues.
“Create a premium outdoor campaign image for the original shoes on a muted clay surface at golden hour. Keep both shoes, outsole pattern, stitching, laces, logo marks, materials, and proportions unchanged; leave clean space above for copy.”
The prompt names the campaign composition and the small physical details that shoppers use to recognize the product.
The right workflow depends on whether you need fast concept variation, physical capture control, or predictable layout assembly. Compare the trade-offs instead of treating one method as universal.
| Decision | Nano Banana Pro | Traditional studio shoot | Template editor |
|---|---|---|---|
| Starting material | One authorized product reference plus a written scene brief; the workflow is built around preserving visible product details. | A physical sample, photographer, set, lighting, and a planned shot list; the camera captures the real object. | A prepared cutout, layout template, or stock element; the quality depends on the assets already available. |
| Variation speed | Fast concept variations from the same reference, with White background and Lifestyle scene modes in one workbench. | Strong repeatability after a set is built, but each new setting, prop, or angle can require production time and coordination. | Fast for fixed layouts and text changes; new physical perspectives or believable scenes may require separate assets. |
| Control trade-off | Useful for scalable concepts, but inspect logos, small text, edges, reflections, and geometry before publishing. | Best when exact physical material, reflections, color matching, and legal evidence of the photographed sample are central. | Best when alignment, typography, and repeatable brand layouts matter more than changing the photographed environment. |
| Best fit | Choose it for reference-led product concepts, catalog cutouts, and campaign directions that need quick iteration. | Choose it for final hero assets where physical capture and controlled lighting justify the production overhead. | Choose it for assembling approved assets into consistent listings, social cards, or ad variations. |
Best fit: Nano Banana Pro is the practical middle path when a real reference matters but you need more scene variation than a fixed template can provide. It does not replace a physical shoot when material accuracy or final color proof is the priority.
Answers for source images, background modes, commercial review, credits, and output choices.
AI product photography uses a product reference and a visual instruction to create a new catalog or campaign image. The reference anchors the product while the prompt describes the background, scene, lighting, camera intent, and details that must remain unchanged.
White background is designed for an isolated catalog subject and requests a transparent output that can be previewed on white. Lifestyle scene uses an opaque background and adds a described setting, surface, light, or props around the product.
The workflow is designed to prioritize the reference and the prompt's preserve list, but generated images can still alter tiny text or geometry. Compare the result with the source at full size and do not publish until every required mark is correct.
The workbench shows 30 credits for 1K, 50 credits for 2K, and 80 credits for 4K before you submit. The current total is visible next to the Generate button and generation requires sign-in and available credits.
Use only source images and product marks you are authorized to use, then review the output against the product and your channel requirements. AI-generated imagery should be treated as a draft until text, shape, color, and disclosure requirements have been checked.
Start with one authorized image, choose the output job, and keep the original product details on your review checklist.