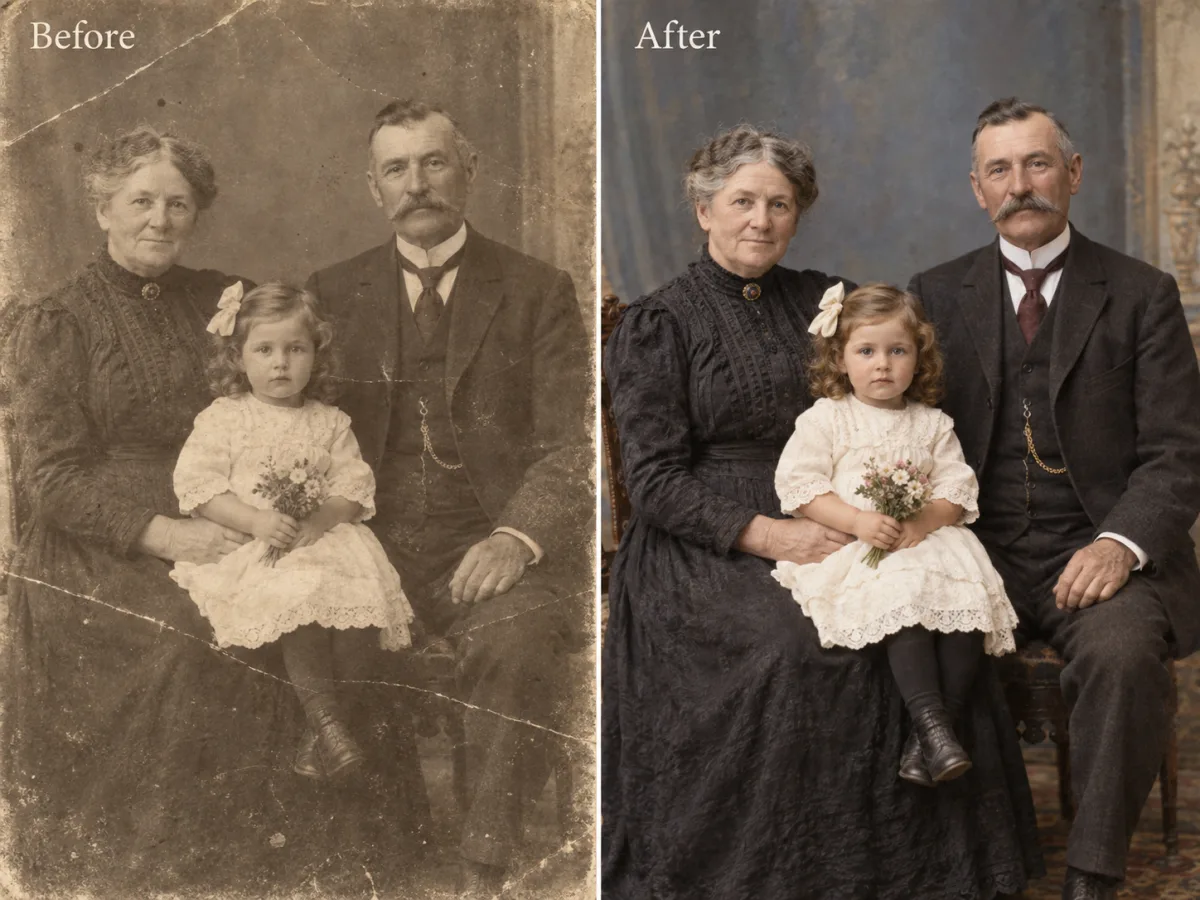
 Portrait / colorize
A family portrait brought back into color
A faded black-and-white portrait is cleaned, contrast is recovered, and natural period-accurate color is added without changing the faces or the framing.
Old Photo Restoration turns one damaged or faded photograph into a repaired, sharpened, and optionally colorized image. Upload the original, choose a restoration treatment, and inspect the result against the source at up to 4K before you download.
Waiting for the original photograph
Upload one damaged, faded, or black-and-white photograph, choose a restoration treatment, and the result will appear here with a draggable Before / After review.
Restoration is most useful when the treatment follows the damage. These studies show the intended decision: recover the structure first, then decide how far color and detail should be reconstructed.
Portrait / colorizeA faded black-and-white portrait is cleaned, contrast is recovered, and natural period-accurate color is added without changing the faces or the framing.
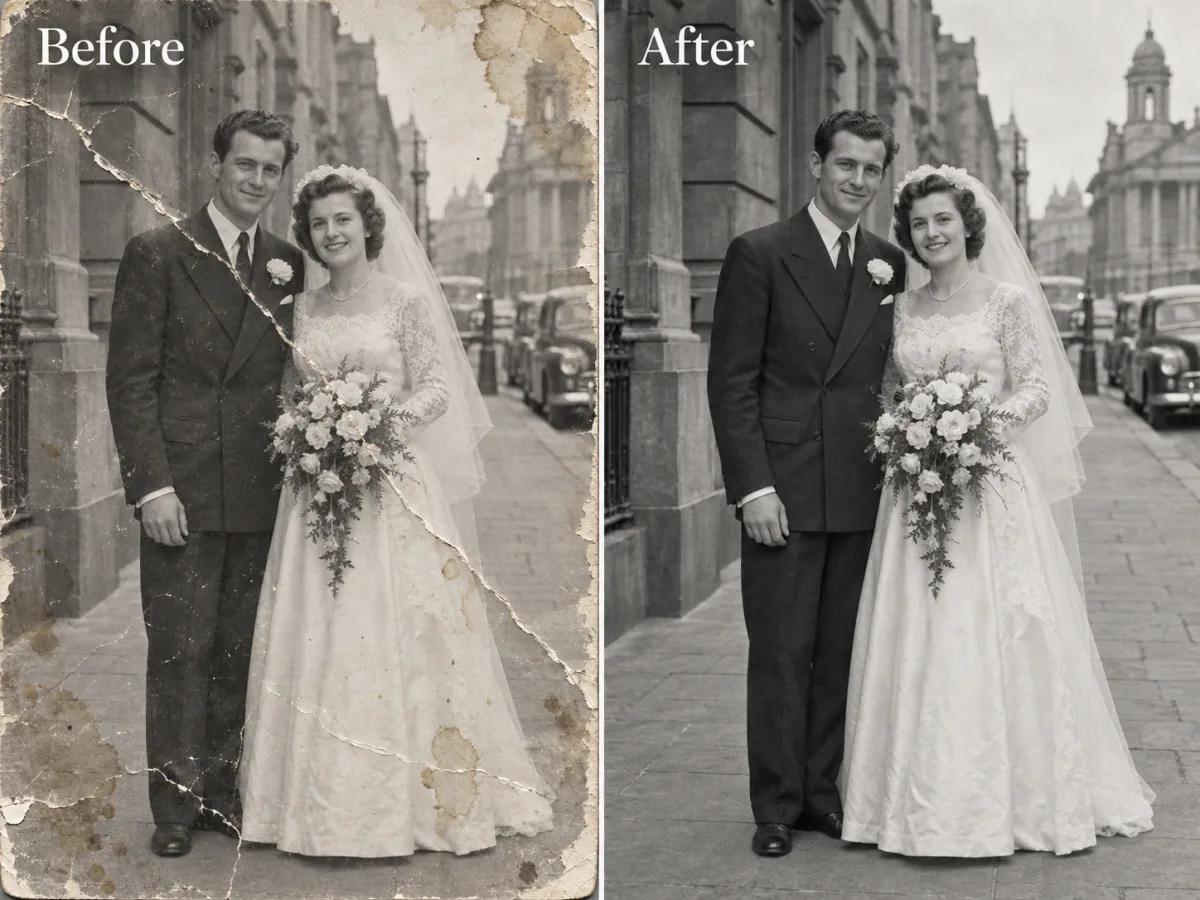 Damage / repair
Creases, scratches, dust, and a torn edge are reconstructed so the print reads as one continuous image while the original monochrome character is preserved.
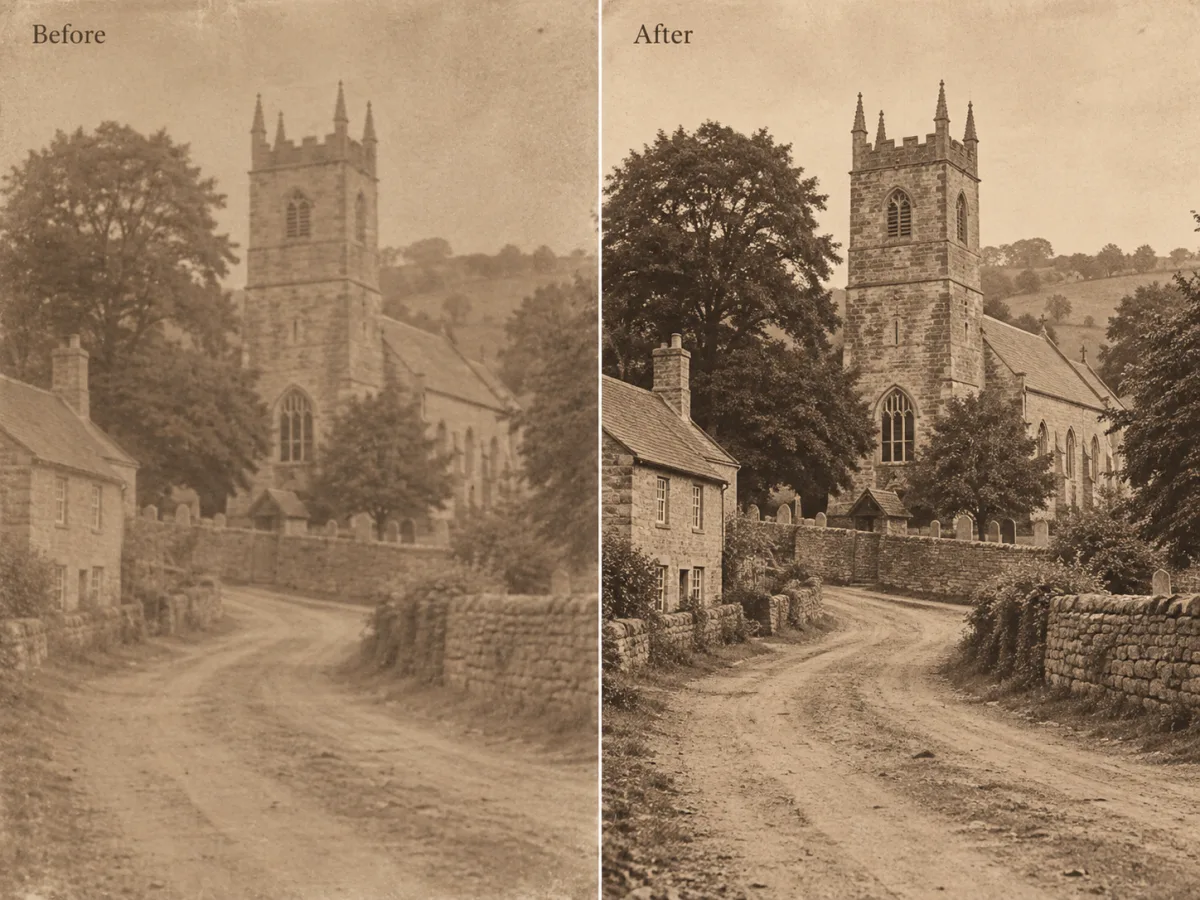 Scene / enhance
Noise, blur, and low contrast are reduced, and small details such as foliage, windows, and signage are sharpened without inventing objects that were never in frame.
AI photo restoration rebuilds a damaged or faded photograph by repairing scratches, tears, dust, stains, and fading, then recovering clarity and, when requested, adding natural color. It is an interpretation rather than a forensic reconstruction: detail that is missing from the scan cannot be recreated with certainty, so faces, text, insignia, and uniform details should always be checked against the original print.
The practical goal is controlled recovery. A useful restoration keeps the subject recognisable, preserves the original composition and mood, and removes the damage without smoothing away the character that makes an old photograph feel authentic. That is why this page keeps the source image in the same review stage as the restored result.
Start with the highest-quality scan you have. A flat 300–600 DPI scan or a sharp phone capture in even light gives the model more information to recover. Restoration can repair damage, but it cannot reconstruct detail that was never captured, and heavily blurred or over-compressed files remain the hardest inputs.
The treatment selector is a real generation setting, not a decorative label. Pick the treatment that matches the damage you want to address.
Repairs creases, tears, scratches, dust, stains, and fading, then recovers contrast and skin tones, reduces noise, reconstructs fine detail, and adds natural color.
Best for badly damaged or faded photographs that need everything.
Fixes creases, tears, scratches, dust, stains, and fading and recovers tonal range while deliberately keeping the original black-and-white or sepia look.
Best for archival prints that should stay monochrome.
Keeps the existing structure, faces, and detail and adds natural, period-accurate color without adding or removing any content.
Best for clean black-and-white portraits and family photos.
Reduces noise and grain, sharpens soft focus and blur, and recovers facial features and small details while keeping the original color character.
Best for photos that are intact but soft, grainy, or low contrast.
The page keeps the workflow short enough for a first attempt while exposing the review step that prevents a polished result from hiding an important mistake.
Add a JPG, PNG, or WebP scan or photo of the original print. Use the highest-resolution version you have so the model has more information to recover.
Confirm the thumbnail is the print you intended to restore.
Select full restore, repair damage, colorize, or enhance. The selected treatment shapes the provider prompt together with any optional guidance you add.
Match the treatment to the damage instead of always choosing the strongest option.
Drag the Before / After divider across faces, hands, text, uniforms, and hard edges. Download only when the restoration preserves the details that matter.
Keep the original scan as the archival reference for any later restoration attempt.
The comparison below describes the public workflow each product presents, not a benchmark of hidden model quality. The useful distinction is where the decision and inspection happen: this page puts the restoration treatment and the Before / After review in one focused tool, at a published credit cost.
| Criterion | Nano Banana Pro | Remini | VanceAI |
|---|---|---|---|
| Primary workflow | Upload one photo → choose a restoration treatment → compare → download | Mobile-app-first enhancement with one-tap restore and upscale flows | Browser-based suite with separate restore, enhance, and colorize tools |
| Restoration control | Four explicit treatments plus optional guidance, sent as one generation request | Preset one-tap treatments with limited per-image direction | Multiple specialist tools that are chosen before the image is processed |
| Review before export | Built-in Before / After divider keeps the source scan and result together | Preview within the mobile workflow before saving | Preview and download inside each tool page |
| Colorization | Colorize is a selectable treatment, and repair-only keeps the monochrome look | Color restore is offered inside the enhancement flow | Colorization is available as a separate tool |
| Output resolution | Choose 1K, 2K, or 4K before generating, with the price shown up front | Resolution tiers depend on the app plan and platform | Output options vary by tool and credit pack |
| Best fit | Users who want a focused, treatment-led restoration with an explicit check step and transparent credits | Users who prefer a fast, mobile, one-tap enhancement | Users who want a broad browser toolkit with many separate utilities |
Choose Nano Banana Pro when the restored photograph is the deliverable and you want the treatment choice, source comparison, resolution, and credit cost in one compact workspace. For every tool, inspect faces, text, insignia, and exact details before using a restoration commercially or for archival records.
Clear expectations make the first restoration more useful and make the review step faster.
Use the highest-resolution scan or capture you have, in even light and in focus. A flat 300–600 DPI scan is ideal for prints. JPG, PNG, and WebP files are supported. The model can repair damage, but it cannot recover detail that was never captured.
Yes. The Repair damage treatment removes creases, tears, scratches, dust, and fading while deliberately preserving the original black-and-white or sepia character. Choose Full restore instead when you also want natural color added.
The Colorize treatment keeps the existing structure, faces, and detail and adds natural, period-accurate color without adding or removing content. Because color is inferred, treat the result as a plausible interpretation and check clothing, insignia, and skin tones against any known references.
The request asks the image model to preserve the exact identity, faces, expressions, clothing, pose, composition, and framing. Because the output is an AI interpretation, always compare the restored face and any uniform or document detail with the original before relying on it.
Yes. After generation, the result stage keeps the uploaded source under a draggable Before / After divider so you can inspect the restoration before downloading it.
The dedicated page shows 15 credits at 1K, 30 credits at 2K, and 50 credits at 4K before you generate. Uploading and choosing a treatment do not consume generation credits; credits are reserved when the authenticated generation request is accepted.
Review the current Nano Banana Pro Terms of Service and make sure you have the rights to the original photograph and the people in it. Always inspect the output for changed faces, invented detail, text, or insignia before publishing it.
Start with the print that matters, choose the treatment that matches the damage, and let the Before / After stage decide whether the result is ready to keep.